
097 - 24 Ways to Use Piano Safari Sight-Reading Cards in Your Teaching

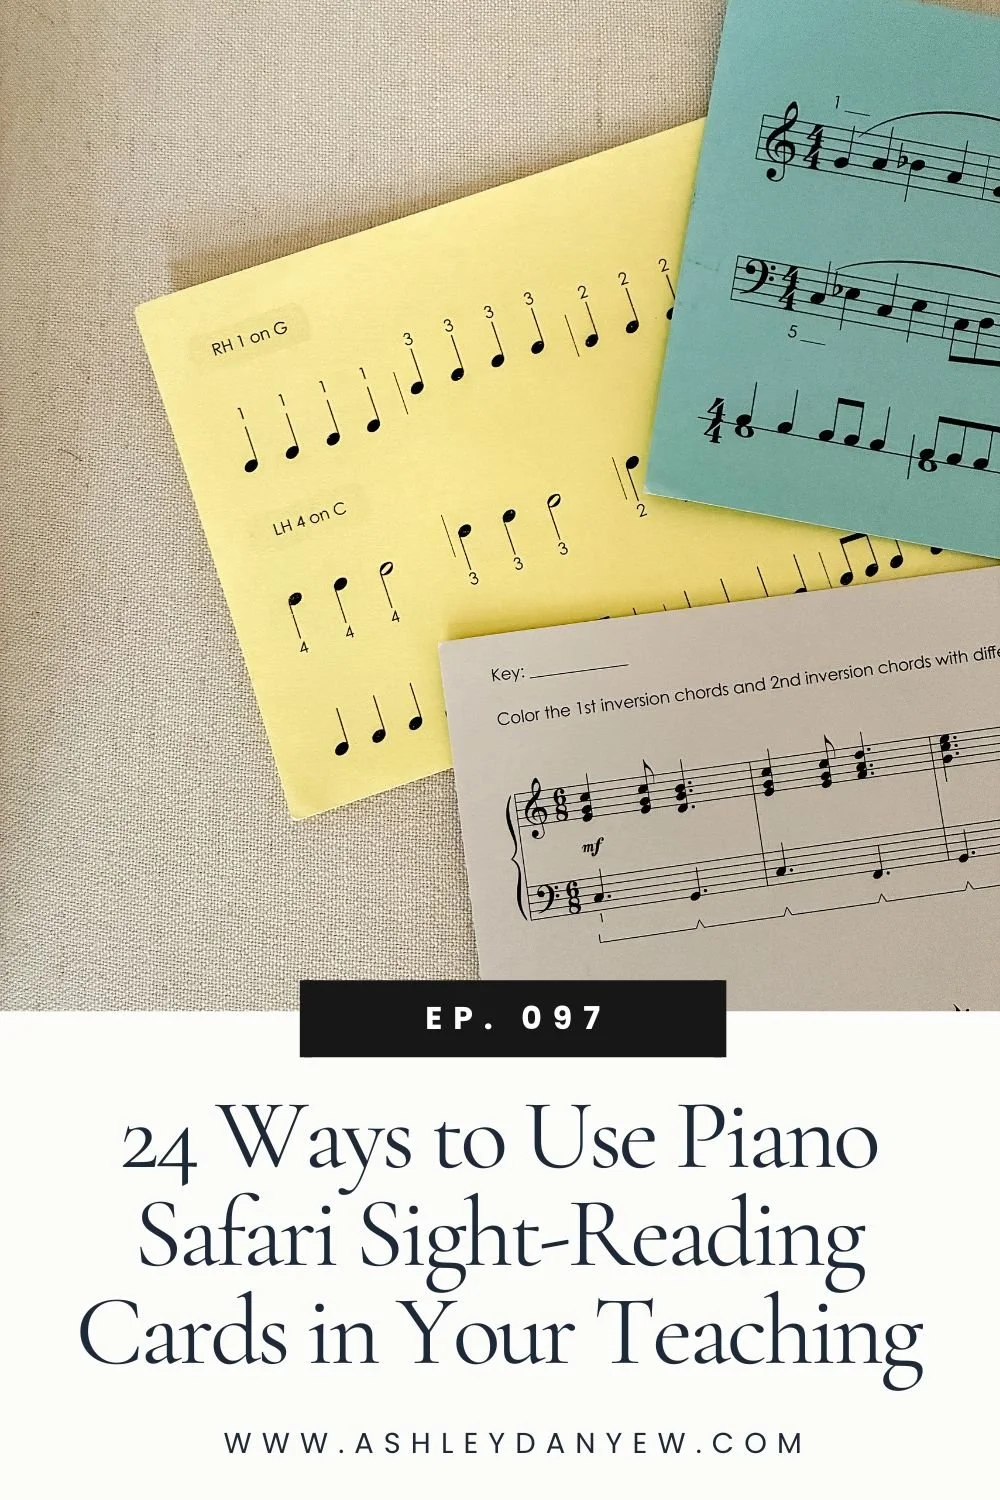
I started using Piano Safari in my studio five years ago. There are a lot of things I like about the curriculum and pedagogical approach—the emphasis on rote teaching and pattern-based learning, creative exploration and improvisation, an intervallic approach to reading, and repertoire that is expressive and captivating for young learners—but one of my favorite resources is their correlated sight-reading cards.
Piano Safari has three levels of sight-reading cards available, corresponding with the three levels of their method book series. Each pack includes 80-98 unique cards (depending on the level), divided into color-coded units for easy organization. Each card includes 1-2 sight-reading examples and a rhythmic-reading example. In Level 1, the examples are hands separate, but partway through Level 2, they include examples written on the grand staff for hands-together playing.
Level 1 starts with off-staff notation (black keys and white keys), moving to staff notation beginning on Treble G and Bass C. Exercises include unisons, 2nds, and 3rds.
Level 2 introduces 4ths and 5ths, sharps and flats, and dotted quarter note rhythms.
Level 3 includes exercises in C major, A minor, G major, E minor, F major, and D minor. Meters include 4/4, 3/4, 2/4, and 6/8, and rhythms include eighth rests and sixteenth notes.
These sight-reading cards can be used as a supplement with any standard reading method, with children or adults, in private or group settings.
In this episode, I’ll share my 7-step teaching process for using these cards in lessons with elementary and early-intermediate students, and 24 creative ways to incorporate them into your teaching to promote musical creativity and ensemble playing and develop keyboard skills and aural skills.
Developing Sight-Reading Skills: A 7-Step Teaching Sequence
A teaching sequence is a helpful framework for introducing a new concept or helping a student develop a new skill. In music, we have several:
Kodály’s prepare-present-practice
Gordon’s aural/oral-verbal-symbolic
Orff’s imitation-exploration-improvisation-literacy
You may use one or more of these in your teaching. There may also be times when you create your own teaching sequence, learned through experience. That’s what I’ve done with teaching sight-reading.
Most of my students use the Piano Safari method, so I try to include a sight-reading card in almost every lesson. When introducing a card, I often follow these teaching steps:
Tap and count the rhythm, hands separately or hands together, using finger clusters—this is where you put all of your fingertips together in a row to make a rounded hand shape. Some variations on this: We might clap and count the rhythm, or I’ll have a student point and count.
Identify repeated patterns. This is useful for looking for repeated rhythm patterns in the beginning and later, identifying when there might be repeated tonal patterns, but the rhythm changes, or where the pattern is the same tonally and rhythmically.
Name the key and starting notes. For beginners, we just focus on naming the starting notes and maybe what the “home” note is.
Analyze the intervals—looking for steps vs. skips, identifying chords, and looking for larger intervals as you get to those more advanced levels.
Practice silently on top of the keys, paying close attention to fingering. This gives students a chance to audiate the music before playing it out loud.
Play the example out loud in a steady tempo, keeping eyes on the music. I like to remind students that, for the most part, these cards do not include tempo markings, so they should set a tempo that they can keep steady.
Evaluate how it went, then play it again.
This last step is important because the examples themselves are not written with repeats. However, I find that having students play through the exercise again helps solidify their learning and build confidence.
This step-by-step sequence helps students develop pattern recognition, hands-together coordination (where that’s applicable), and audiation skills, right from the beginning. They’re learning how to analyze music notation, identify intervals and chords (by the time they get to Level 3), and break music apart into its various components.
They’re learning how to trust their hands—to play confidently with their eyes on the music—and to keep going no matter what happens.
The more I use these cards, the more I recognize new and creative ways to integrate them into both private lessons and studio classes. From composition and improvisation to keyboard skills, ensemble playing to aural skills and movement, here are 24 musical activities to do with Piano Safari sight-reading cards:

24 Musical Activities to Do With Piano Safari Sight-Reading Cards
Composition & Improvisation
Create a new version by rearranging the patterns in the sight-reading example.
Use the rhythm example on the bottom of the card to create a melody in a given 5-finger position.
For examples with a clear melody/accompaniment, keep the accompaniment the same and improvise a new melody.
Keep the notes the same, but change the rhythm.
Use this example as a starter idea for a new piece and create another 4-bar phrase to follow.
Make a variation by changing the direction of the notes, rhythm patterns, articulation, or dynamics.
Keyboard Skills
Transpose the example to a new key.
Transform the example to another mode—for example, minor to major or major to minor.
Play the example with both hands in parallel motion, one octave apart.
For single-line sight-reading examples, harmonize it using blocked intervals (maybe just a 5th, or maybe a 5th and 6th), or you could do single notes in the bass (tonic and dominant).
Related: Ep. 086 - Teaching Keyboard Skills to Students of All Ages
Ensemble Playing
Perform the rhythm example as a duet with a peer or teacher performing a different example in the same meter.
Play the sight-reading example with a peer or teacher, using call and response for each measure.
Play the sight-reading example with a peer or teacher, alternating measures.
Play the sight-reading example with a peer or teacher doubling in another octave.
Play the sight-reading example with a peer or teacher accompanying using blocked intervals or roots of the chords.
Create a drum accompaniment while a peer or teacher performs the sight-reading example.
Aural Skills
Listen to your teacher play the example with one mistake and edit the notation to match.
Echo-sing each pattern using solfege or a neutral syllable like “doo.”
Sight-sing the example using solfege or a neutral syllable.
Identify the pattern you hear your teacher sing from the example.
Identify the example your teacher plays from one of 2-3 cards.
Related: Ep. 026 - My Favorite Aural Skills Games & Activities
Movement
Create body percussion to go with each level of rhythm (e.g. half notes = step, quarter notes = pat legs, eighth notes = clap)
Create a corresponding movement to go with each measure/rhythm pattern.
Identify the technical gesture that’s used in each pattern (e.g. bouncy arm, finger staccato, roll around, down-and-up with the wrist, wrist circle, etc.)
Summary
For the most part, these are all things I’ve included in lessons or studio classes with my students, and it’s fun to be able to pick and choose based on what you want to introduce.
If you’re looking for a way to incorporate improvisation, choosing one of those six things from the list.
If you’re looking for a way to develop more keyboard skills, especially in your intermediate students, there are some ideas for how to use those sight-reading cards in that way.
Ensemble playing is always fun for studio classes to give students a chance to perform together or sight-read together.
Aural skills and movement are also good to work into private lessons or class settings, especially matching what they hear demonstrated to a particular example in front of them. So, using three sight-reading cards laid out across the piano and only playing one of the examples.
I hope this inspires you to consider all the ways you can use sight-reading materials like the Piano Safari sight-reading cards in your teaching. Do you have a favorite sight-reading resource? What does your teaching sequence look like?
And if you’re already using the Piano Safari cards in your studio, I’d love to hear how you use them. Send me a message and let me know!









It started with an aspiration: “I want to get back into regular practicing,” I said to Steve one day. “But without a performance commitment, it’s hard to justify the time. What’s the point?” “There doesn’t need to be a point,” he said simply. “Do it for you. I think you’d enjoy it.”
In that moment, I gave myself permission to start: A recommitment, a new routine, an artistic practice.